LT 3.1 Connecting to the Viewer
Part 1 (see lesson 3.1)
We’ll only focus on ideas for the illustrative design for this module. This is the design you need to create for your feature article that will also be on the cover of your magazine.
Look at the brief in the course assignment again – specifically the part about the target market. Imagine the printed magazine in their hands. Now, think of the artwork for the cover specifically.
Make notes on the following:
- What kind of style and content will speak to the target market?
- What kind of reaction do you want to create with the viewer?
- How are you going to achieve that?
Create a separate mood board for your illustrative design
After contemplating these questions and making notes, go online and into the real world and find some inspiration. Look at the specific content of the article you are creating this artwork for. In addition to that, also look at some illustrative design styles that you feel you can achieve. Make a mood board specifically for your illustrative design and include this in your report.
ANSWER:
- What kind of style and content will speak to the target market?
– I think a pop music style with brutalist elements included will speak to this target market, where I can combine digital assets with custom-made illustrations to deliver the messaging I want. Using the chaotic brutalist style with a mix of pop can give an interesting, colorful and spacious design which I think will fit well. A well-structured content layout with interesting photography, typography and elements will speak well to this target market.
- What kind of reaction do you want to create with the viewer?
-I want create nostalgia, efficiency and honesty with my viewers. I feel these feelings are the most fitting for this kind of style and target market we are aiming for.
- How are you going to achieve that?
-To achieve this, I will include visually interesting photography, elements and custom illustrations to help the viewer go through the content. I will include colors and typography to strenghten the feeling of nostalgia, and with the help of the layout I will make the magazine efficient and honest to read.
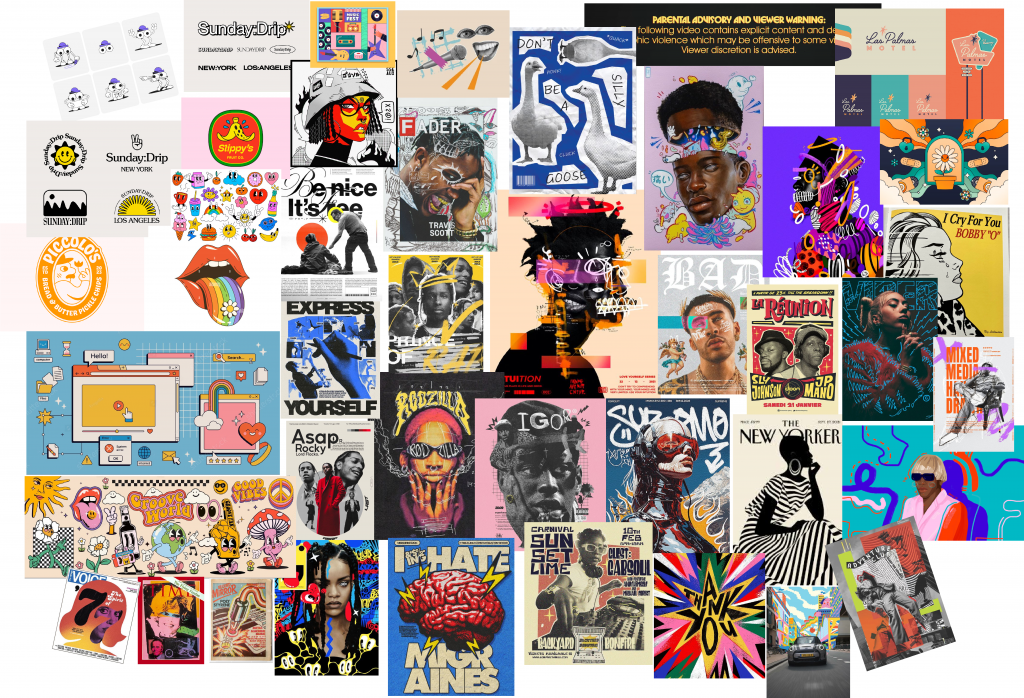
My Moodboard:
Part 2 (see lesson 3.2)
We’ll only focus on ideas for the illustrative design for this module. This is the design you need to create for your feature article that will also be on the cover of your magazine.
We are going to start the idea development process today! Use Idea generation methods to guide you.
- Write down the article’s name in the middle of a page.
- Use idea development methods to explore the concept and write down any visual ideas.
- Now that you have some rough ideas explore how you can use the attributes of attraction, efficiency, or humour as discussed in the lesson.
- Make thumbnail sketches and write out ideas of how to apply this to your illustrative design.
- Include rough sketches and notes about this in your report.
Answer:
- Use idea development methods to explore the concept and write down any visual ideas.
(Done)
- Now that you have some rough ideas explore how you can use the attributes of attraction, efficiency, or humour as discussed in the lesson.
I could use attributes of attraction with the help of contrasting and harmounious colors, simple shapes, neat layout, typography and custom-illustrations. I could explore some layouts where the golden section is in focus which is the best way to attract viewers, make them feel at ease and appear easy to read.
- Make thumbnail sketches and write out ideas of how to apply this to your illustrative design.
- Include rough sketches and notes about this in your report.
Part 3 (see lesson 3.3)
We are still working on ideas for the cover image today. Grab the rough ideas you worked on yesterday and do some further exploration:
- See if you can use any of the following attributes in your concept: intelligence, anger or pride.
- Include rough sketches and notes about this in your report
Part 4 (see lesson 3.4)
We are still working on ideas for the cover image today. Grab the rough ideas you worked on before and do some further exploration:
- See if you can use any of the following attributes in your concept: innocence, nostalgia, or honesty.
- Include rough sketches and notes about this in your report.
Part 5 (self-study)
Now that you have ideas for your illustrative design, you still might wonder how to actually do the work! How do you turn your rough ideas on paper into a finished design?
The course below is presented by Von Glitschka. He is a designer, illustrator, and creative director of Glitschka Studios, a multidisciplinary design firm in the Pacific Northwest, United States. He’s a popular speaker on design, creativity, branding, and marketing and has written six books.
In this course, he will break down the process of illustrative graphic design into beginner-friendly steps. He will show you how to prepare for the illustration task by defining your theme, subject matter, and style, and then gathering reference material.
He covers several drawing processes, stepping through deductive drawing, thumbnail drawing, rough drawing, and a final refined drawing. He also shares helpful tips on finalising your designs and presenting them to clients.
After completion of this module assignment (MA03), you will:
- Be able to implement all that you’ve learnt in your course assignment.
- Receive a LinkedIn Learning® Certificate you can add to your resume.
- Have better knowledge of using illustrative design in your work (it will be especially helpful in logo design!).